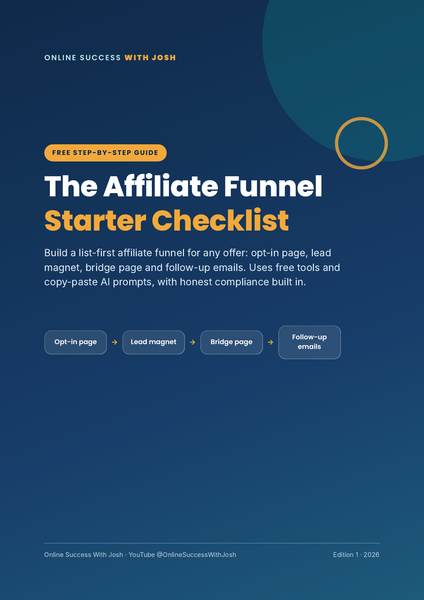
The Affiliate Funnel Starter Checklist
Build a list-first affiliate funnel for any offer: opt-in page, lead magnet, bridge page and follow-up emails. Uses free tools and copy-paste AI prompts, with honest compliance built in.
Keep this page handy: bookmark it so you can come back anytime, or download the PDF version below to keep your own copy.
Online Success With Josh · YouTube @OnlineSuccessWithJosh · Edition 1 · 2026
Why "list first" beats sending clicks straight to an offer
Most beginners paste an affiliate link into a post and hope. If a visitor isn't ready to buy that day, they're gone for good. A list-first funnel gives you a second, third and seventh chance to help that person, and it builds an audience you own.
- 1 · Opt-in page: Offers a free, useful resource in exchange for a name and email.
- 2 · Lead magnet: The free resource itself: a checklist, cheat sheet or mini-guide.
- 3 · Bridge page: Thanks them, then gives honest context about the product you recommend.
- 4 · Follow-up emails: A short sequence that teaches, answers objections and recommends.
How to use this checklist
- ☐ Work through the 8 steps in order. Tick each box only when it's actually done.
- ☐ Build one funnel for one offer first. Don't start a second funnel until the first one is live and tracked.
- ☐ Use the copy-paste AI prompts (see "10 copy-paste AI prompts") to draft faster, then edit every draft yourself.
- ☐ Run the compliance check (see "The compliance mini-checklist") before anything goes public.
Honest expectations: A funnel is a system for turning attention into subscribers and subscribers into informed buyers. It is not a money machine. It needs traffic, which you'll create, and results vary widely. Some people earn nothing. This guide teaches a method; it does not promise income.
What's inside
- Pick one offer and check it properly
- Set up your email foundation
- Create your lead magnet
- Build your opt-in page
- Build your thank-you / bridge page
- Write your follow-up emails
- Choose one traffic channel
- Track what matters
Plus: the compliance mini-checklist · 10 copy-paste AI prompts · a free tool stack · an optional automation shortcut.
Step 1: Pick one offer and check it properly
Your reputation is worth more than any commission. Choose an offer you'd be comfortable explaining to a friend, limits included.
- ☐ Relevance: the offer solves a problem your audience actually talks about. Read the comments under videos in your niche.
- ☐ Sales page read in full: you can explain in one sentence what the product does, and what it doesn't do.
- ☐ Price map written down: front-end price, any order bump (checkbox at checkout), and every upsell (OTO) after purchase.
- ☐ Refund policy found: how many days, and who handles it (the vendor or the marketplace).
- ☐ Affiliate rules read (JV page / affiliate terms): banned claims, banned traffic sources, brand-name ad bidding, email rules, required disclosures.
- ☐ Red-flag scan: countdown timers that reset, "launch price" that never ends, income screenshots, "no work needed", testimonials you can't verify. None of these go into your promotion.
- ☐ Vendor support exists: a support desk or email is listed, and the vendor has a track record.
- ☐ Your affiliate link tested: click it in a private window. It should land on the right sales page. Save it exactly as issued, without editing or shortening.
- ☐ Access decided: if you can get review access or buy and test it, do. If not, never write "I use it"; say "the vendor says…" instead.
Quick filter: If you couldn't tell your audience the full price including upsells, the refund window and one honest limitation, don't promote the offer.
Step 2: Set up your email foundation
Your list is the one asset no algorithm can take away. Set it up correctly once.
- ☐ Autoresponder chosen: e.g. AWeber, or a free-tier tool such as Systeme.io (free plan: 2,000 contacts, per its pricing page, Apr 2026).
- ☐ One list per funnel/topic, named clearly (e.g. "Affiliate Funnel Checklist").
- ☐ Confirmed (double) opt-in switched on: better deliverability and a record of consent.
- ☐ Sender set up: a real "From" name people recognise, and an email address on your own domain if you have one.
- ☐ Physical postal address added to your account footer. This is required by the US CAN-SPAM Act in every marketing email.
- ☐ Unsubscribe link in every email (most tools add it automatically). Honour opt-outs promptly.
- ☐ Privacy policy page written: who you are, what you collect (name and email only), why, which email provider stores it, and how to be deleted.
- ☐ Link settings checked: some tools automatically add tracking parameters to every link. If that would change an affiliate link, switch it off for that list.
- ☐ Test subscriber added (your own second email) so you see exactly what subscribers see.
Never do this: Don't buy email lists, use "safe lists" or add people from groups and chats without permission. It breaks anti-spam law and your email provider's terms, and it wrecks deliverability.
Step 3: Create your lead magnet
The free resource that earns the email address. It must be genuinely useful on its own, never a disguised advert.
- Checklist: Best when…: The task has clear steps (setup, launch, audit); Length: 1–3 pages
- Cheat sheet: Best when…: People need quick reference (prompts, formulas, shortcuts); Length: 1–2 pages
- Mini-guide: Best when…: A concept needs explaining before action; Length: 5–10 pages
- Swipe / template: Best when…: People need a starting draft (emails, posts, scripts); Length: 1–5 pages
- Resource list: Best when…: People are overwhelmed by tool choices; Length: 1–2 pages
- ☐ One problem, one promise: the magnet solves one specific problem connected to the offer you'll recommend.
- ☐ Quick win: the reader can use it within 15–30 minutes of downloading.
- ☐ Specific title: "The ___ Checklist / Cheat Sheet for ___". No income promises in the title.
- ☐ Designed simply: a free design tool (e.g. Canva) with your brand name, 1–2 colours, and big clear headings. Export as PDF.
- ☐ Logical bridge: near the end, briefly mention the product as an optional next step, with an affiliate disclosure right next to the link.
- ☐ Hosted with a working download link (autoresponder file hosting, cloud storage set to "anyone with the link", or your site).
- ☐ Proofread: spelling, links clickable, no leftover AI filler or placeholders such as {{NAME}}.
Step 4: Build your opt-in page
One page, one job: get the right person to request the free resource.
- ☐ Headline names the outcome of the lead magnet: "Build your first ___ step by step".
- ☐ Sub-headline says what it is and who it's for, in one sentence.
- ☐ 3–5 benefit bullets describing what's inside. Be specific and honest.
- ☐ Cover image of the lead magnet (a simple mockup is fine).
- ☐ Form asks only for first name and email. Every extra field lowers sign-ups and adds privacy obligations.
- ☐ Button text describes the result ("Send me the checklist"), not just "Submit".
- ☐ Consent line under the button: what emails they'll get (including product recommendations with affiliate links), plus "unsubscribe anytime" and a link to your privacy policy. No pre-ticked boxes.
- ☐ Footer with affiliate disclosure and earnings disclaimer.
- ☐ Mobile check: open it on your phone. Most social traffic is mobile.
- ☐ Test sign-up completed: form → thank-you page → confirmation email → delivery email.
Step 5: Build your thank-you / bridge page
The page people see right after signing up. It's the moment of highest attention, so don't waste it, and don't just copy the vendor's sales page.
- ☐ Confirmation first: "You're in. Check your inbox (and spam/promotions) and click the confirm link."
- ☐ Delivery explained: exactly how and when the lead magnet arrives.
- ☐ Affiliate disclosure placed prominently, above the first product link, in plain words.
- ☐ Problem context: why the problem is hard to solve by hand (1–2 short paragraphs).
- ☐ What the product does, in neutral words. Label vendor statements as the vendor's ("the vendor says…").
- ☐ Who it suits, and who it doesn't. This builds trust and reduces refunds.
- ☐ Real pricing: front-end price, and the fact that an order bump and upsells exist (all optional).
- ☐ Refund policy and who handles it.
- ☐ One clear call to action to the official page, using your affiliate link exactly as issued.
- ☐ A no-pressure exit: "Not ready? Your checklist still shows you how to do it all for free."
Don't copy vendor hype: If the vendor's page says "price ends tonight" but the cart has stayed open for weeks, don't repeat it. Only mention urgency that is real, dated and verifiable.
Step 6: Write your follow-up emails
A short sequence that helps first and recommends second. Aim for plain, friendly, one-idea emails.
- 1: Email job: Delivery; Send: Immediately; What goes in it: Download link, what to do first, what to expect from you
- 2: Email job: Problem / insight; Send: Day 1; What goes in it: Why most beginners get stuck, reframed
- 3: Email job: Education; Send: Day 2; What goes in it: One useful how-to they can apply today
- 4: Email job: Solution intro; Send: Day 3; What goes in it: Introduce the product honestly, with disclosure
- 5: Email job: Objection; Send: Day 5; What goes in it: Answer the biggest hesitation: cost, upsells, "is it hype?"
- 6: Email job: Proof / use case; Send: Day 7; What goes in it: Only verifiable evidence: public demos and documented features
- 7: Email job: Decision; Send: Day 9; What goes in it: A clear, calm recommendation. No fake deadline
- ☐ Subject lines are honest: no fake "Re:", no "payment received", no income figures.
- ☐ Disclosure next to every affiliate link (e.g. "affiliate link: I may earn a commission").
- ☐ Mostly value: at least as many teaching emails as selling emails. After the sequence, send regular value emails rather than repeating the pitch.
- ☐ Footer: unsubscribe link and your physical postal address.
- ☐ Links tested in the test send; affiliate link unchanged.
Step 7: Choose one traffic channel, and stick with it
Consistency on one channel usually beats scattered posting on six. Pick the one where your people already are and where you can show up every week.
- YouTube (long-form): Content that fits: Tutorials, walkthroughs, honest reviews; Where your link goes: Top of the description (clickable)
- YouTube Shorts: Content that fits: 30–60 s tips pointing to a full video; Where your link goes: "Related video" link; channel link (Shorts description links aren't clickable)
- Instagram: Content that fits: Reels, carousels, Stories; Where your link goes: Bio link; Story link sticker
- TikTok: Content that fits: Short tutorials; Where your link goes: Bio link (if your account is eligible)
- Facebook Page / group you run: Content that fits: Tips, short videos, discussion; Where your link goes: In the post or your Page button
- Telegram / community you run: Content that fits: Tips, updates, resources; Where your link goes: In the post
- ☐ Social posts link to your opt-in page, not straight to the affiliate link. This builds your list, and many platforms treat raw affiliate links with suspicion.
- ☐ Posting rhythm set (e.g. 3 posts a week) in a calendar. Every post has one job (teach, show or invite) and one next step.
- ☐ Platform rules checked: turn on paid-promotion / branded-content toggles when you promote an affiliate product, and never use "get rich quick" language.
- ☐ No spam: no mass DMs, no dropping links in other people's groups, no fake engagement.
Step 8: Track what matters
You can't improve what you can't see. Keep it simple.
- ☐ UTM tags on your own links (not on affiliate links): ?utm_source=youtube&utm_medium=video&utm_campaign=funnel1
- ☐ Source tags in your autoresponder so you know where each subscriber came from.
- ☐ Weekly numbers logged: visits → sign-ups (opt-in rate) → confirmations → email clicks → affiliate clicks → sales → refunds.
- ☐ One change at a time: test one headline or one post style for a week, then compare.
Your weekly tracker: Make a simple spreadsheet with these columns: Week · Page visits · Sign-ups · Opt-in % · Confirmations · Email clicks · Affiliate clicks · Sales · Refunds. Fill it in every Monday.
The compliance mini-checklist
Honest promotion protects your audience, your accounts and your affiliate status. Run this on every page, post and email.
Disclosures (US FTC Endorsement Guides and platform rules)
- ☐ Disclose affiliate relationships clearly and close to the link, e.g. "I earn a commission if you buy through this link." "Affiliate link" on its own may not be understood.
- ☐ In videos, disclose in the video (said and shown on screen), not only in the description.
- ☐ On Instagram and other truncated captions, put the disclosure before the "…more" cut-off.
- ☐ A disclosure hidden only in the comments or on a separate page isn't enough.
- ☐ Turn on the platform's tools too: YouTube "paid promotion", TikTok "commercial content", Meta "branded content" where applicable.
Claims
- ☐ No income or earnings claims ("make $X a day", income screenshots, "quit your job") unless you can prove they're typical. For beginners, simply don't make them.
- ☐ No experience you don't have: don't say "I use it" or "it worked for me" unless it's true.
- ☐ No fake or AI-generated reviews and testimonials. Don't reuse vendor testimonials as if they were independent.
- ☐ No fake urgency or scarcity: only real, dated deadlines.
- ☐ Vendor claims labelled as the vendor's ("the vendor says…").
Email (CAN-SPAM, GDPR basics)
- ☐ Permission only (confirmed opt-in), and a clear statement of what subscribers will receive.
- ☐ Honest From name and subject lines; a physical postal address; a working unsubscribe link.
- ☐ For subscribers in the EU/UK: freely given consent (no pre-ticked boxes), a privacy notice, deletion on request, and a record of consent.
Useful references: FTC endorsement FAQs: ftc.gov/business-guidance/resources/ftcs-endorsement-guides-what-people-are-asking
CAN-SPAM guide: ftc.gov/business-guidance/resources/can-spam-act-compliance-guide-business
YouTube paid promotion: support.google.com/youtube/answer/154235
TikTok branded content policy: tiktok.com/legal/page/global/bc-policy/en
This checklist is general information, not legal advice.
10 copy-paste AI prompts
Paste into ChatGPT, Claude, Gemini or similar. Replace the [brackets]. Always fact-check and edit the output: AI tools confidently invent statistics, credentials and claims.
Prompt 1 · Offer summary
Here is the text of a sales page: [paste]. Summarise in plain English: what the product is, what it does step by step, who it's for, who it's NOT for, the price, any order bump or upsells mentioned, and the refund policy. List separately any claims that sound like marketing hype or can't be verified.
Prompt 2 · Audience pain points
Here are real comments from people in my niche: [paste 10–20 comments]. Group them into the top 5 problems, using their exact words. For each, suggest one helpful free resource I could create.
Prompt 3 · Lead magnet outline
Create a 1–3 page checklist titled "[title]" for [audience] who struggle with [problem]. Each item must be a concrete action. No income claims, no hype. End with a short "next step" section.
Prompt 4 · Opt-in page
Write an opt-in page for a free [lead magnet] for [audience]: a headline under 12 words, a one-sentence sub-headline, 4 specific benefit bullets, button text, and a consent line saying they'll get emails with tips and product recommendations that may contain affiliate links. No income claims or fake urgency.
Prompt 5 · Bridge page
Write a short bridge page recommending [product] to people who just downloaded [lead magnet]. Include: a plain-language affiliate disclosure at the top, the problem context, what the product does (labelled as the vendor's description), who it suits and who it doesn't, price [price] with a note that optional upsells exist, refund policy [policy], and one call to action. Don't invent results or testimonials.
Prompt 6 · Email sequence
Write a 7-email sequence for subscribers who downloaded [lead magnet]: 1 delivery, 2 problem insight, 3 education, 4 introduce [product], 5 handle the objection "[objection]", 6 use case based only on these verified facts: [facts], 7 decision. Plain-text style, under 250 words each, an honest subject line and preview text for each, an affiliate disclosure next to each product link, no fake deadlines, no income claims.
Prompt 7 · Subject lines
Give me 15 honest, curiosity-driven subject lines for an email about [topic]. No clickbait that misrepresents the content, no "Re:"/"Fwd:", no income figures, under 45 characters.
Prompt 8 · Short video script
Write a 40-second vertical video script teaching [one tip] to beginners. Hook in the first 2 seconds, 3 quick steps, on-screen text suggestions, and a CTA: "Free checklist, link in my bio." No income or "get rich" language.
Prompt 9 · Compliance review
Review this marketing copy: [paste]. Flag anything that could be an income claim, an unverifiable claim, fake urgency, an implied personal experience, or a missing affiliate disclosure. Suggest a compliant rewrite for each flag.
Prompt 10 · Weekly review
Here are my funnel numbers for this week: [visits, sign-ups, confirmations, email clicks, affiliate clicks, sales, refunds] and last week: [same]. Identify the weakest step and suggest ONE change to test next week.
Free and low-cost tool stack
- Email + landing pages: Options: AWeber; Systeme.io (free plan); Notes: Both include landing pages, so you don't need a website to start
- Lead magnet design: Options: Canva (free), Google Docs → PDF; Notes: Keep it simple and readable
- Writing help: Options: ChatGPT, Claude, Gemini (free tiers); Notes: Use the prompts above, and edit everything
- File hosting: Options: Autoresponder file upload, Google Drive / Dropbox link; Notes: Test the link in a private window
- Tracking: Options: UTM tags + autoresponder stats + your affiliate dashboard; Notes: A simple weekly spreadsheet is enough
- Video: Options: Phone camera, free screen recorders, CapCut; Notes: Clear audio matters more than fancy visuals
Optional shortcut: Want to automate the drafting of Steps 3–6?
Affiliate disclosure: the link below is an affiliate link. If you buy through it, Online Success With Josh earns a commission at no extra cost to you. You don't need this tool to use this checklist: everything above can be done by hand with free tools.
Everything in this checklist can be done manually. If you'd rather have software draft the pieces for you, one tool built for this is Automated Commission Machine AI (ACM) by Ben Fletcher, sold on WarriorPlus.
What the vendor says it does
- You paste an affiliate offer's sales-page link (or pick one from its built-in offer library).
- It drafts an opt-in page, a PDF lead magnet, a bridge page and follow-up emails (up to 5 on Standard).
- It hosts the pages, inserts your affiliate link and connects to autoresponders including AWeber.
What to know first
- It doesn't bring traffic. You still need Step 7.
- Price (seen at checkout, 25 Sep 2026): Standard $57, VIP $97, one-time. There's an optional bundle checkbox at checkout and optional upsells after purchase.
- 30-day refund, handled by the vendor.
- AI drafts still need your edits and a compliance check (see "The compliance mini-checklist").
Link: https://warriorplus.com/o2/a/y0nmlfd/0/pdf
Prices and features can change. Check the vendor's page before buying.
Earnings disclaimer: No income is guaranteed. Results depend on your effort, skills, traffic and many other factors, and you may earn nothing. This guide is educational and is not financial or legal advice. Some links in this guide are affiliate links, disclosed where they appear.
© 2026 Online Success With Josh · YouTube @OnlineSuccessWithJosh · You're receiving this guide because you requested it. Questions? Just reply to any of my emails.